Connect your account, draft with AI, schedule, and publish—step by step
01.
Connect Facebook
Click Connect Facebook in OneClickAIPost and sign in to your Facebook account.
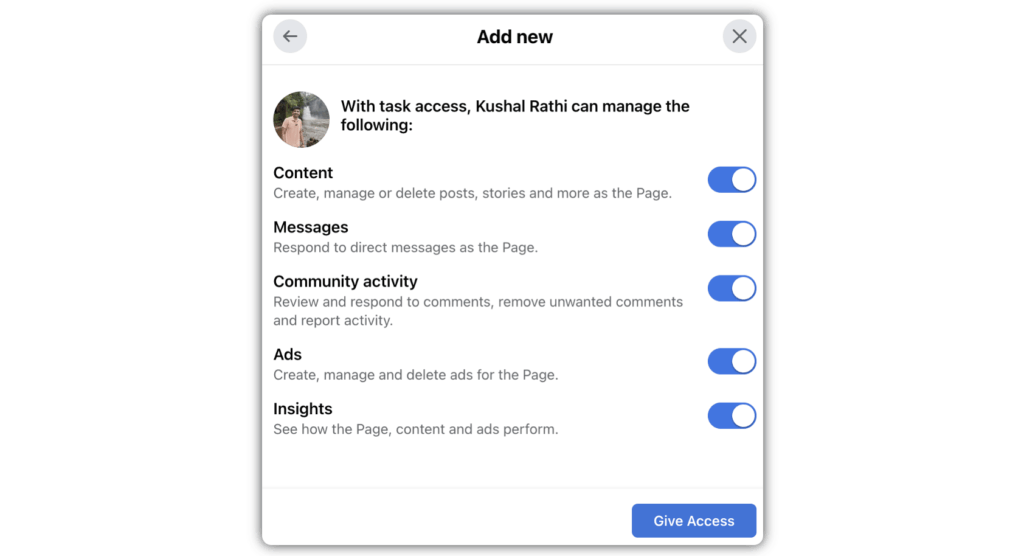
Grant permissions so we can create and manage posts on your Page.
Select the Page you want to use (if you manage more than one). Tip: You can revoke access anytime in Facebook → Settings & privacy → Settings → Business integrations / Apps and websites.
02.
Recieve AI Dashboard link
Your administrator will send you a unique link to the OneClickAIPost AI Dashboard.
Check your email inbox (and spam/junk) for the invite message.
Click the link to open the dashboard and set your password (or sign in if you already have one). Tip: This link is tied to your account—don’t share it publicly.
03.
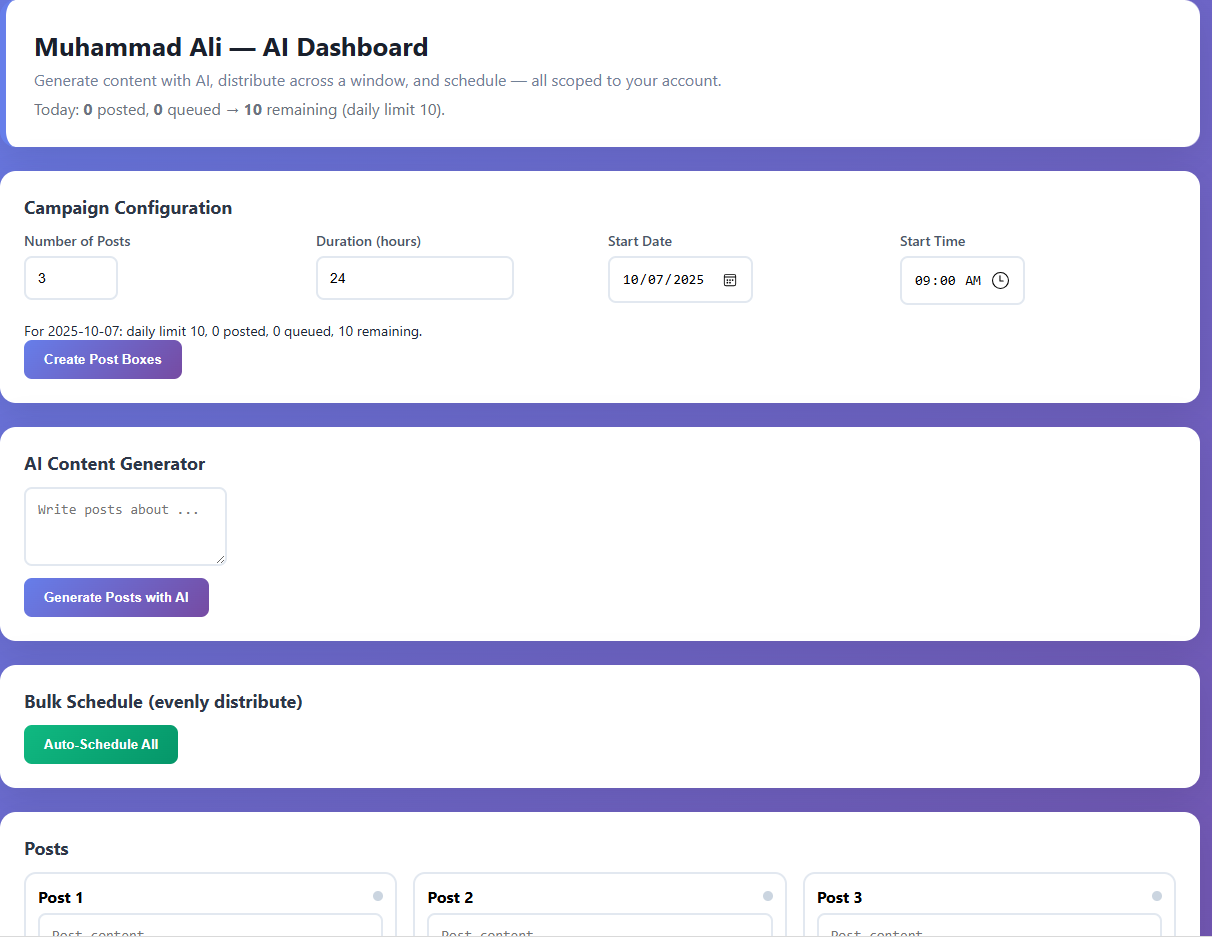
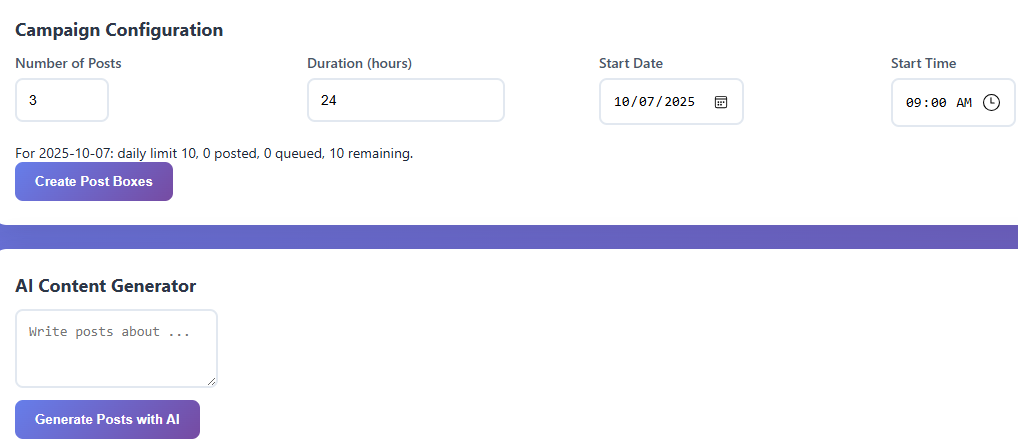
Choose page & post type
Enter your goal (announcement, offer, update, launch) and desired tone.
AI generates Page-ready copy with optional hashtags and CTA suggestions.
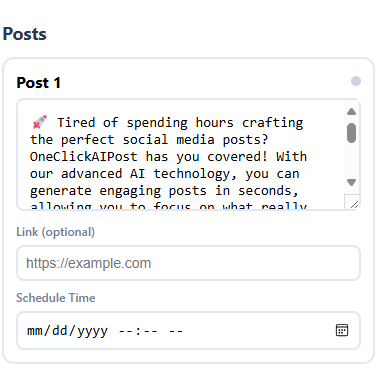
Attach images or video, or paste a link to show a link preview. Tip: Make the first two lines attention-grabbing; include one clear CTA.
04.
Review, schedule, and automate
Review the AI drafts and make any edits you want.
Set the date & time for each post (or use best-time suggestions).
Click Automation to queue everything—boom! your posts will publish at the scheduled times. Tip: You can pause or reschedule any queued post anytime.
This powerful tool eliminates the need to leave Salesforce to get things done as I can create a custom proposal with dynamic pricing tables.